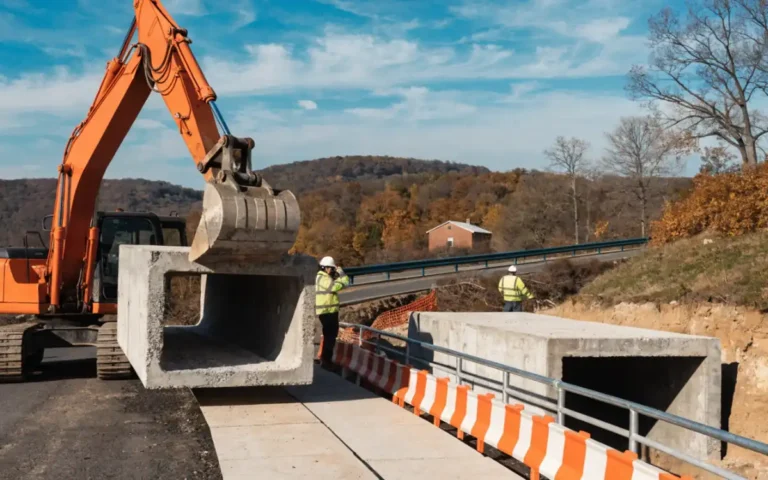
Adding concrete steps to your home is one of the most effective ways to improve accessibility and boost curb appeal. Whether you are replacing a crumbling wooden staircase or adding a new entrance to your patio, concrete offers a level of durability and permanence that other materials simply cannot match.
Why Choose Concrete for Your Outdoor Stairs?
Concrete is the gold standard for outdoor transitions because of its structural integrity. Unlike wood, which is susceptible to rot and termite damage, or stone, which can shift and become a tripping hazard over time, a well-poured set of concrete steps acts as a monolithic structure.
Cost of Construction Per Sq Ft: A Guide to Budgeting and Safety
According to the American Concrete Institute, properly mixed and cured concrete can last for over 50 years with minimal maintenance. Furthermore, concrete provides a “blank canvas” for homeowners. You can leave it with a classic broom finish for slip resistance or explore stamped patterns that mimic slate, brick, or cobblestone.
Phase 1: Planning and Calculating Your Dimensions
Before you mix a single bag of cement, you need a precise plan. Improperly sized steps are not just an eyesore; they are a significant safety risk.
Measuring Rise and Run
The “rise” is the vertical height of each step, and the “run” is the horizontal depth of the tread. A standard, comfortable staircase usually follows the “7-11” rule: a 7-inch rise and an 11-inch run.
- Total Rise: Measure the vertical distance from the ground to the top of the landing.
- Number of Steps: Divide the total rise by 7. If you get a fraction, round up and adjust the height of each step slightly to keep them uniform.
- Tread Depth: Ensure each tread is deep enough for a foot to rest comfortably, typically between 11 and 12 inches.
Phase 2: Excavation and Subgrade Preparation
The secret to preventing concrete steps from cracking or sinking lies beneath the surface. You cannot pour concrete directly onto topsoil or grass.
Construction Sign: The Ultimate Guide to Site Safety and Compliance
Clearing the Area
Start by marking the perimeter of your steps with stakes and string. Excavate the area to a depth of about 6 to 8 inches. You want to remove all organic matter, as decomposing roots create air pockets that lead to settling.
Creating a Solid Base
Fill the excavated area with 4 inches of compactable gravel or crushed stone. Use a plate compactor to ensure the base is rock-solid. A stable subgrade is essential for drainage and frost-heave protection. The Portland Cement Association emphasizes that a uniform subgrade is the single most important factor in preventing structural cracks in residential concrete.
Phase 3: Setting the Forms for Concrete Steps
Forming is the most technical part of the job. Your forms act as the “mold” that will hold the heavy, wet concrete in place.
- Materials: Use 3/4-inch plywood for the side forms and 2×8 or 2×10 lumber for the risers.
- Pitch for Drainage: To prevent water from pooling on your finished concrete steps, tilt the forms slightly forward. A slope of 1/8 inch per foot is sufficient to allow rainwater to run off the treads.
- Bracing: Concrete is incredibly heavy—roughly 150 pounds per cubic foot. Use plenty of 2×4 stakes on the outside of your forms to prevent “blowouts” where the wood bows outward under the pressure of the wet mix.
Buc-ee’s Monroe County Construction Approval: Everything You Need to Know
Phase 4: Reinforcement and Pouring
For long-lasting concrete steps, you must reinforce the internal structure. This helps the concrete handle tension and temperature fluctuations.
Using Rebar and Mesh
Drill “dowels” into the existing foundation or wall to tie the new steps to the house. Lay a grid of #4 rebar (1/2-inch diameter) throughout the form. Ensure the rebar is suspended in the middle of the pour using “chairs” so it doesn’t sink to the bottom.
The Pouring Process
When ordering concrete, specify a 4,000 PSI mix with air-entrainment if you live in a climate with freeze-thaw cycles. Start pouring at the bottom step and work your way up. Use a shovel or a vibration tool to consolidate the concrete, ensuring there are no air bubbles trapped against the forms.
Featured Snippet: How long should concrete steps cure before use? You can typically walk on new concrete steps 24 to 48 hours after pouring. However, the concrete takes 28 days to reach its full design strength. Avoid heavy loads or salt application during this initial month.

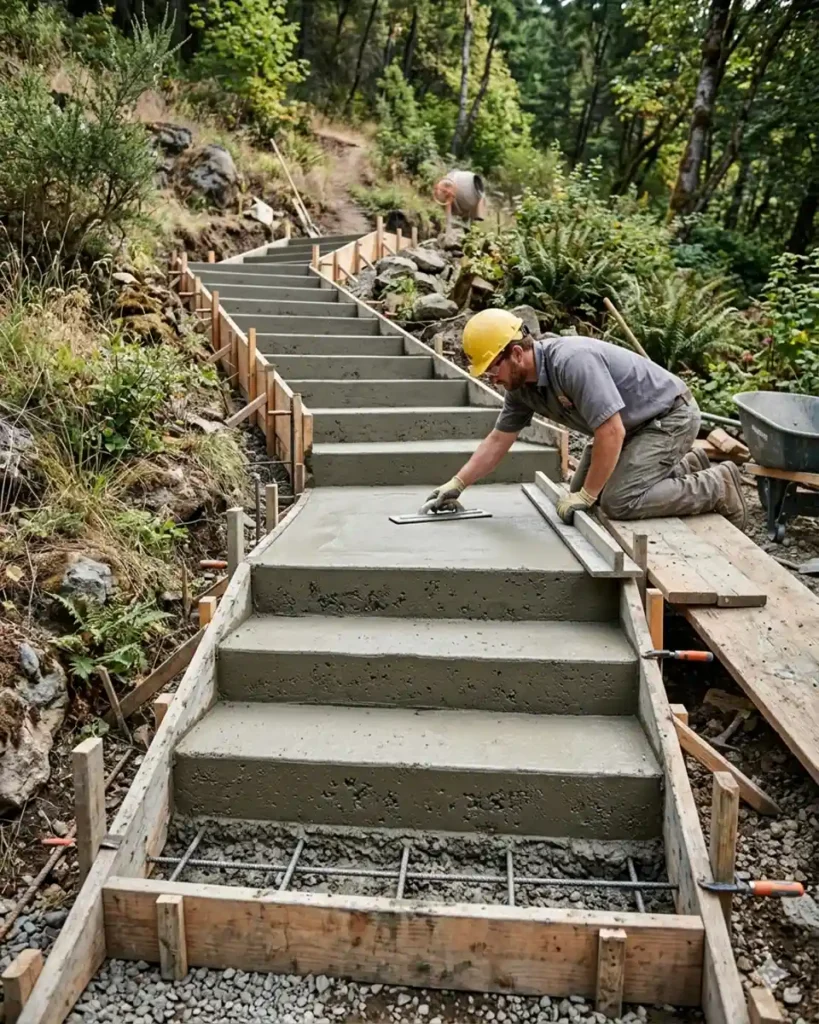
Phase 5: Finishing Techniques for Safety and Style
The finish determines both the look and the safety of your stairs. Since these are outdoor concrete steps, a smooth “trowel” finish is actually dangerous because it becomes slippery when wet.
- Screeding: Use a straight board to level the concrete with the top of the forms.
- Edging: Use an edging tool to create rounded corners. This prevents the edges from chipping off over time.
- Broom Finish: Once the concrete has set slightly (when it feels like stiff putty), pull a specialized concrete broom across the surface. This creates small ridges that provide essential traction.
For more advanced decorative ideas, the Concrete Network provides excellent resources on integral coloring and chemical stains that can make your stairs look like natural stone.
Building Materials News: 2026 Trends and Market Insights
Common Mistakes to Avoid
- Ignoring the Weather: Do not pour concrete if rain is expected within 24 hours or if temperatures are slated to drop below freezing.
- Adding Too Much Water: It’s tempting to add water to make the mix easier to pour, but this weakens the chemical bonds and leads to “spalling” (surface flaking).
- Removing Forms Too Soon: Leave the forms in place for at least 24 hours. Removing them while the concrete is still “green” can cause the corners of your concrete steps to slump or break.
Maintaining Your Concrete Steps
To keep your concrete steps looking new, apply a high-quality penetrating sealer every 2 to 3 years. This protects the surface from oil stains, UV damage, and water penetration. During winter, avoid using rock salt (sodium chloride), which can eat away at the finish; opt for sand or calcium magnesium acetate instead.
Regular inspections are also key. If you notice small hairline cracks, fill them immediately with a concrete caulk to prevent water from entering and expanding during a freeze. According to safety guidelines from the Occupational Safety and Health Administration (OSHA), maintaining uniform stair height and slip-resistant surfaces is critical for preventing falls in residential and commercial settings.
Final: Take the First Step
Building your own concrete steps is a challenging but deeply rewarding project. By focusing on a solid foundation, precise measurements, and proper curing, you create a functional feature that adds value and safety to your property for decades.