It usually starts small. You notice a tiny hairline crack on your driveway, or maybe a small chip on the edge of your patio stairs. You think to yourself, I’ll get to that eventually. But after a harsh winter of freezing and thawing, or a blistering summer of intense heat, that tiny crack has turned into a massive, crumbling tripping hazard.
If you are dealing with broken, chipped, or cracked surfaces around your home, you don’t necessarily need to tear everything out and start from scratch. More often than not, the solution is much simpler and cheaper. However, standing in the hardware store aisle trying to find the right concrete patching compound can feel a bit overwhelming with all the options available.
In this guide, we are going to break down everything you need to know about repairing your surfaces. You’ll learn exactly what these products are, how to choose the right one for your specific project, and step-by-step instructions on how to apply it like a seasoned professional.
What Makes a Good Repair Material?
You might be wondering why you can’t just mix up a concrete patching compound bag of standard cement to fill a hole. Standard cement mixes lack the adhesive properties needed to stick to old, cured surfaces. If you try to fill a crack with regular cement, it will simply dry, shrink, and pop right back out within a few weeks.
That is where a specialized concrete patching compound comes into play. These specialized mixtures contain bonding agents—usually advanced polymer resins or epoxies—blended with sand and cement. These additives give the material the “stickiness” required to bind tightly to existing surfaces. They also offer flexibility, allowing the repair to expand and contract slightly with temperature changes without cracking again.
(Internal Linking Opportunity: Link to a guide on “Understanding Concrete Expansion Joints”)
The Ultimate Guide to Choosing and Using a concrete buggy
Types of Repair Products on the Market
Not all cracks are created equal, and neither are the materials used to fix them. Depending on the size and depth of your damage, you’ll want to select one of the following:
Vinyl-Reinforced Patches
These are incredibly popular for DIYers. They come pre-mixed or in a dry powder form that you mix with water. The added vinyl resins make them highly adhesive and perfect for smoothing out scaled surfaces or fixing small chips on steps.
Epoxy-Based Mixes
If you need serious strength, epoxy is the way to go. These usually come in two parts that you mix together right before use. Epoxy is incredibly strong and resistant to chemicals and wear, making it ideal for high-traffic areas like garage floors where vehicles are parked.
Portland Cement-Based Mixes
When you are dealing with concrete patching compound potholes (anything over two inches deep), you need a heavy-duty solution. When shopping for a concrete patching compound for deep repairs, look for Portland cement-based products that often include gravel or coarse aggregate. You will usually need to use a separate liquid bonding agent to ensure it sticks properly to the old surface.
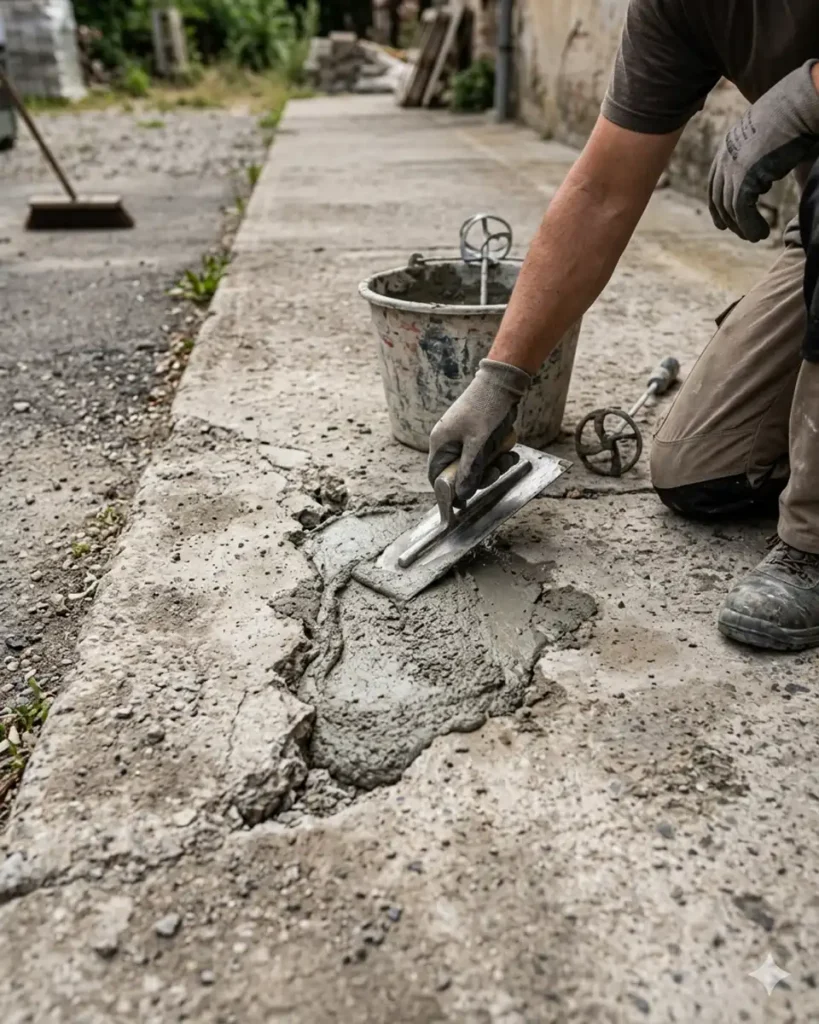
How to Apply It Like a Pro
Applying a concrete patching compound isn’t rocket science, but the success of your project relies almost entirely on the preparation. Here is a step-by-step process to ensure a permanent fix.
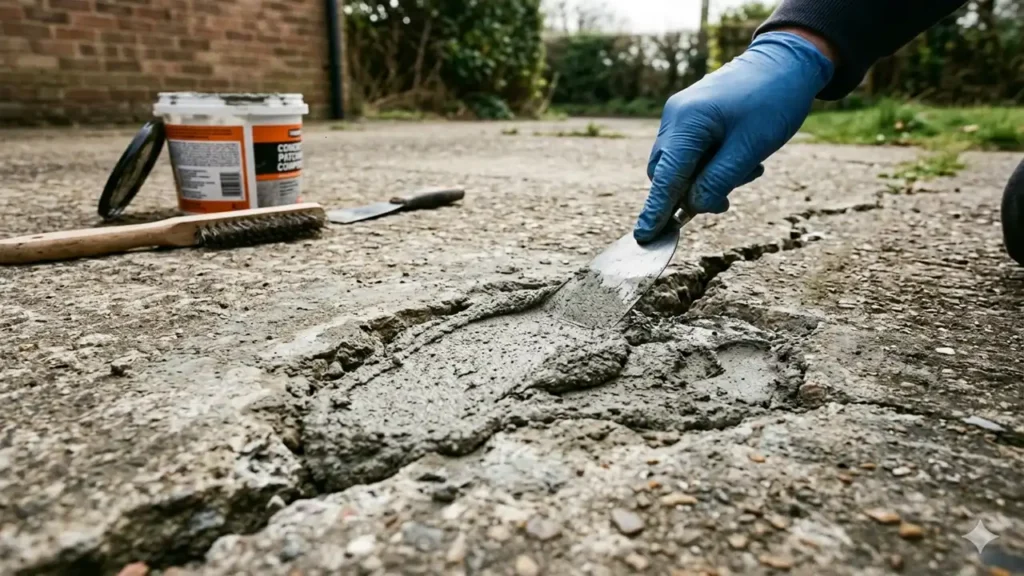
Step 1: Prep the Area
- Clean the crack: Use a wire brush to scrub away any loose debris, crumbling pieces, dirt, or moss.
- Widen the base: If possible, use a chisel and hammer to slightly undercut the edges of the crack (making the bottom wider than the top). This “keys” the material in so it can’t easily pop out.
- Wash it out: Use a high-pressure hose or power washer to blast away dust. Let the area dry completely before moving to the next step, unless your specific product instructions say otherwise.
Step 2: Mix the Material
Follow the manufacturer’s instructions to the letter. If you are using a dry mix, slowly add water until you reach the consistency of thick peanut butter.
Step 3: Application
Using a masonry trowel or putty knife, firmly press the mixture into the crack or hole. You want to force it deep into the crevices to eliminate any air pockets. Slightly overfill the area, as the material may settle.
Step 4: Smoothing and Curing
Use your trowel to feather the edges so they blend seamlessly into the surrounding surface. To match a textured finish, you can lightly drag a stiff-bristled broom across the top while it’s still wet. Let it cure undisturbed according to the package directions.
Spalling Concrete: Causes, Prevention, and Expert Repair Solutions
Mistakes to Avoid During Your Repair
Even enthusiastic DIYers can stumble if they rush the process. Here are a few common pitfalls to watch out for:
- Skipping the cleaning phase: concrete patching compound you apply the mixture over dust or oil, it will stick to the grime instead of the solid base underneath.
- Ignoring the weather: Never apply your concrete patching compound if rain is in the forecast within 24 hours, or if temperatures are expected to drop below 50°F (10°C). Extreme temperatures interfere with the chemical curing process.
- Mixing too much at once: Most fast-setting repair materials harden very quickly. Only mix as much as you can comfortably use within 10 to 15 minutes.
Frequently Asked Questions
How long does a concrete patching compound take to dry?
Drying times vary heavily by brand and type. Fast-setting formulas might be hard to the touch in just 20 to 30 minutes and ready for foot traffic in a few hours. However, standard mixes usually require 24 hours to cure enough for walking, and up to a week before you should drive a heavy vehicle over them.
Do I need to use a liquid bonding agent?
It depends on the product. Many modern vinyl-reinforced products have bonding agents already mixed in, so you just add water. However, if you are using a standard Portland cement mix, painting a liquid bonding adhesive onto the old surface first is highly recommended for a permanent hold.
Can I paint over my repaired driveway?
Yes, but patience is key. You concrete patching compound allow the new material to fully cure which can take up to 28 days for deep repairs—before applying any paint or sealers. If you paint too early, trapped moisture will cause the paint to bubble and peel.
Wrapping Up Your Project
Fixing cracks and potholes doesn’t have to be an expensive or intimidating chore. By taking the time to properly clean the area and selecting the right materials for the depth of your damage, you can easily restore your driveways, sidewalks, and patios to their former glory. Armed with the right concrete patching compound, a little bit of elbow grease, and the techniques outlined above, your repairs will stand up to the elements for years to come.
Ready to tackle that cracked driveway? Explore our comprehensive selection of masonry tools and repair materials today, or contact our expert team if you need personalized advice on choosing the perfect product for your next home improvement project!
Leave a Reply